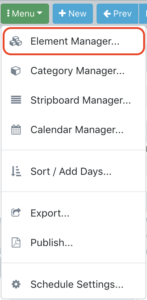
To open the element manager, click on the Menu Dropdown at the top left of the breakdown or recycle bin tabs.

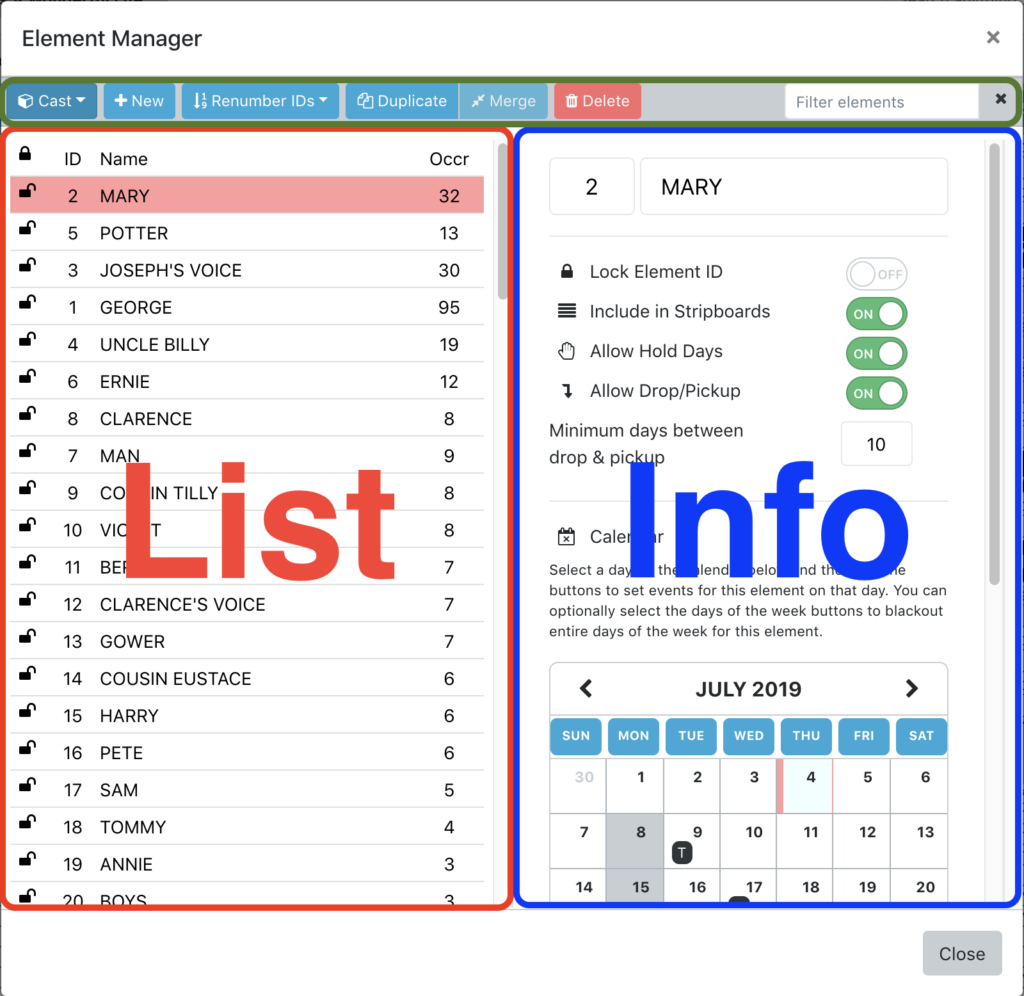
The element manager has a button bar and is split into a into the list and info sections

Button Bar: the button bar contains buttons to perform actions on the elements in the list
Category Dropdown: this dropdown defaults to “Cast” and is a list of all of the categories in the schedule. Select the category that you wish to see in the list.
New: click to create a new element. The new element is added to the list. Click on that new element to edit its info, give it a name, etc.
Renumber IDs: this allows you to automatically add board IDs to the elements in this category. The dropdown has a number at the top with the number to start from, “1” is default. Click Go to renumber the elements. Any elements with locked element IDs will not be renumbered.
Duplicate: if you have one element selected you can click the duplicate button to duplicate it.
Merge: if you have two elements selected you can click this merge button to merge them together. The top-most element will take precedence if there are conflicts between the element’s fields.
Delete: will permanently delete the element from the entire schedule. Be careful.
Filter Elements: enter text here to filter the list of elements
List: the left side is a list of all of the elements in the currently selected category. You may move the elements just like strips. Clicking on an element will show its details on the right side.
Info: This is where you edit all of the info for a particular element.
ID and Name fields: enter the board ID and the name of the selected element
Switches: toggle switches for various settings for the element
Calendar: this is where you will enter any pertinent date information for the element. You can enter blackout dates, travel, fittings and rehearsals. (More info on how to use Think Crew Calendars)
Linked Elements: if an element always needs to work with another element, you can link the two elements together here. For example, let’s say that the character of Bob always needs to work with the existing prop Bob’s Hat. Simply type Bob’s Hat in the linked elements field and it will be added each time Bob is added to a scene from now on. To affect all breakdown sheets where Bob is already working, click the “Add These Linked Elements to Existing Breakdowns” button. Bob’s Hat will be added to all breakdowns where Bob is already working.
Change Category: if an element needs to move from one category from another, you can change which category it belongs to. For example, if the element Umbrella was created as Set Dressing but now needs to become a Prop, simply select Prop from the change category dropdown. The list will change to the props category to show you that Umbrella is now a prop.
