The strip designer in Think Crew gives you powerful tools to create visually informative schedule elements. A well-designed strip helps your production team quickly identify and understand different schedule components at a glance.
Understanding the Strip Designer
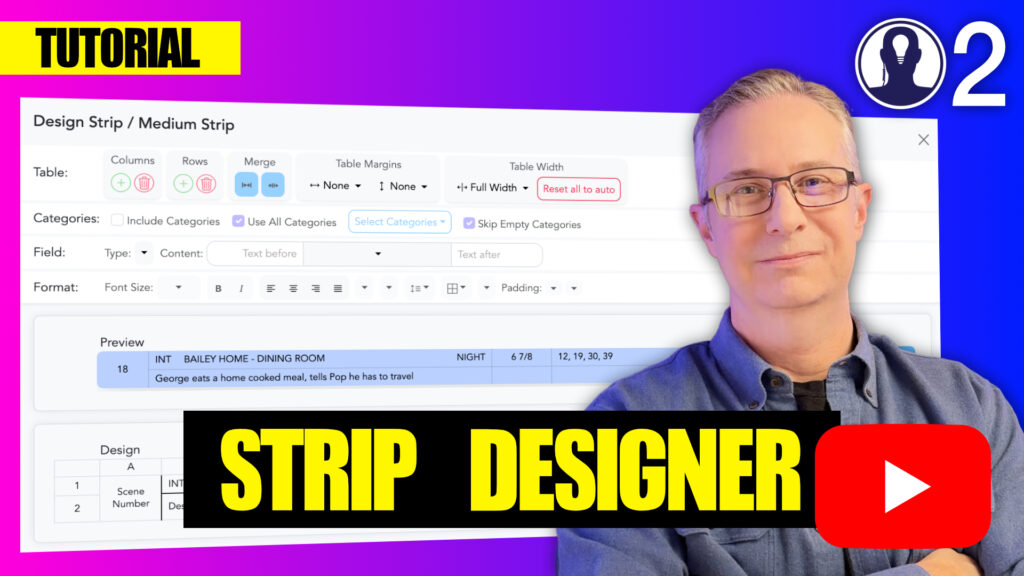
When you create or edit a strip, you’ll work with the strip designer interface, which includes:
- Menu Bar: Contains tools for adding and formatting strip content
- Preview Panel: Shows how your strip will look with actual data
- Canvas Area: The central workspace where you arrange and position elements
Menu Bar Sections
The strip designer menu bar is divided into four key sections, each providing specific functionality:
- Table: Create organized tabular layouts with rows and columns
- Categories: Add category-specific information fields to your strip
- Field: Insert custom and standard data fields
- Format: Control visual aspects like colors, fonts, and borders
Each of these sections offers specific tools and options that help you build a comprehensive strip design tailored to your production needs.
Designer Philosophy
The designer essentially works like a spreadsheet, so if you’re used to creating call sheets in Excel or Sheets, then you already have the basic skills to design a strip.
Each strip is a table, made up of rows and columns. You can adjust the width of the columns by dragging the borders of the column names.
Select a row or column by clicking on its name (numbers for rows and letters for columns). Once selected, you will see the related menu items in the Table menu become active. If you have a column selected, you will see the add and remove column buttons become active. The same is true for the rows.
You can merge cells together or split them apart, just like you would in a spreadsheet. Use the merge items in the Table menu when you have cells selected in the strip.
For more information about each designer menu, see these articles:
Getting Started with Strip Design
- Begin by deciding what information is most important for your production team
- Use the Table section to create the basic structure of your strip
- Merge any cells together, as desired
- Update the fields for each cell
- Apply Formatting to enhance visual clarity and hierarchy
- Test your design using the Preview functionality
Remember that effective strip design balances information density with readability. Include essential information but avoid overcrowding your strips with unnecessary details. Use color, font size, and positioning to create visual hierarchy that guides the eye to the most critical information first.
For detailed guidance on each aspect of strip design, refer to these articles:
Here is a video that covers designing a strip: